Ultralytics Docs
Ultralytics Docs are deployed to https://docs.ultralytics.com.
Install Ultralytics package
To install the ultralytics package in developer mode, you will need to have Git and Python 3 installed on your system. Then, follow these steps:
- Clone the ultralytics repository to your local machine using Git:
git clone https://github.com/ultralytics/ultralytics.git
- Navigate to the root directory of the repository:
cd ultralytics
- Install the package in developer mode using pip:
pip install -e '.[dev]'
This will install the ultralytics package and its dependencies in developer mode, allowing you to make changes to the package code and have them reflected immediately in your Python environment.
Note that you may need to use the pip3 command instead of pip if you have multiple versions of Python installed on your system.
Building and Serving Locally
The mkdocs serve command is used to build and serve a local version of the MkDocs documentation site. It is typically
used during the development and testing phase of a documentation project.
mkdocs serve
Here is a breakdown of what this command does:
mkdocs: This is the command-line interface (CLI) for the MkDocs static site generator. It is used to build and serve MkDocs sites.serve: This is a subcommand of themkdocsCLI that tells it to build and serve the documentation site locally.-a: This flag specifies the hostname and port number to bind the server to. The default value islocalhost:8000.-t: This flag specifies the theme to use for the documentation site. The default value ismkdocs.-s: This flag tells theservecommand to serve the site in silent mode, which means it will not display any log messages or progress updates. When you run themkdocs servecommand, it will build the documentation site using the files in thedocs/directory and serve it at the specified hostname and port number. You can then view the site by going to the URL in your web browser.
While the site is being served, you can make changes to the documentation files and see them reflected in the live site immediately. This is useful for testing and debugging your documentation before deploying it to a live server.
To stop the serve command and terminate the local server, you can use the CTRL+C keyboard shortcut.
Deploying Your Documentation Site
To deploy your MkDocs documentation site, you will need to choose a hosting provider and a deployment method. Some popular options include GitHub Pages, GitLab Pages, and Amazon S3.
Before you can deploy your site, you will need to configure your mkdocs.yml file to specify the remote host and any
other necessary deployment settings.
Once you have configured your mkdocs.yml file, you can use the mkdocs deploy command to build and deploy your site.
This command will build the documentation site using the files in the docs/ directory and the specified configuration
file and theme, and then deploy the site to the specified remote host.
For example, to deploy your site to GitHub Pages using the gh-deploy plugin, you can use the following command:
mkdocs gh-deploy
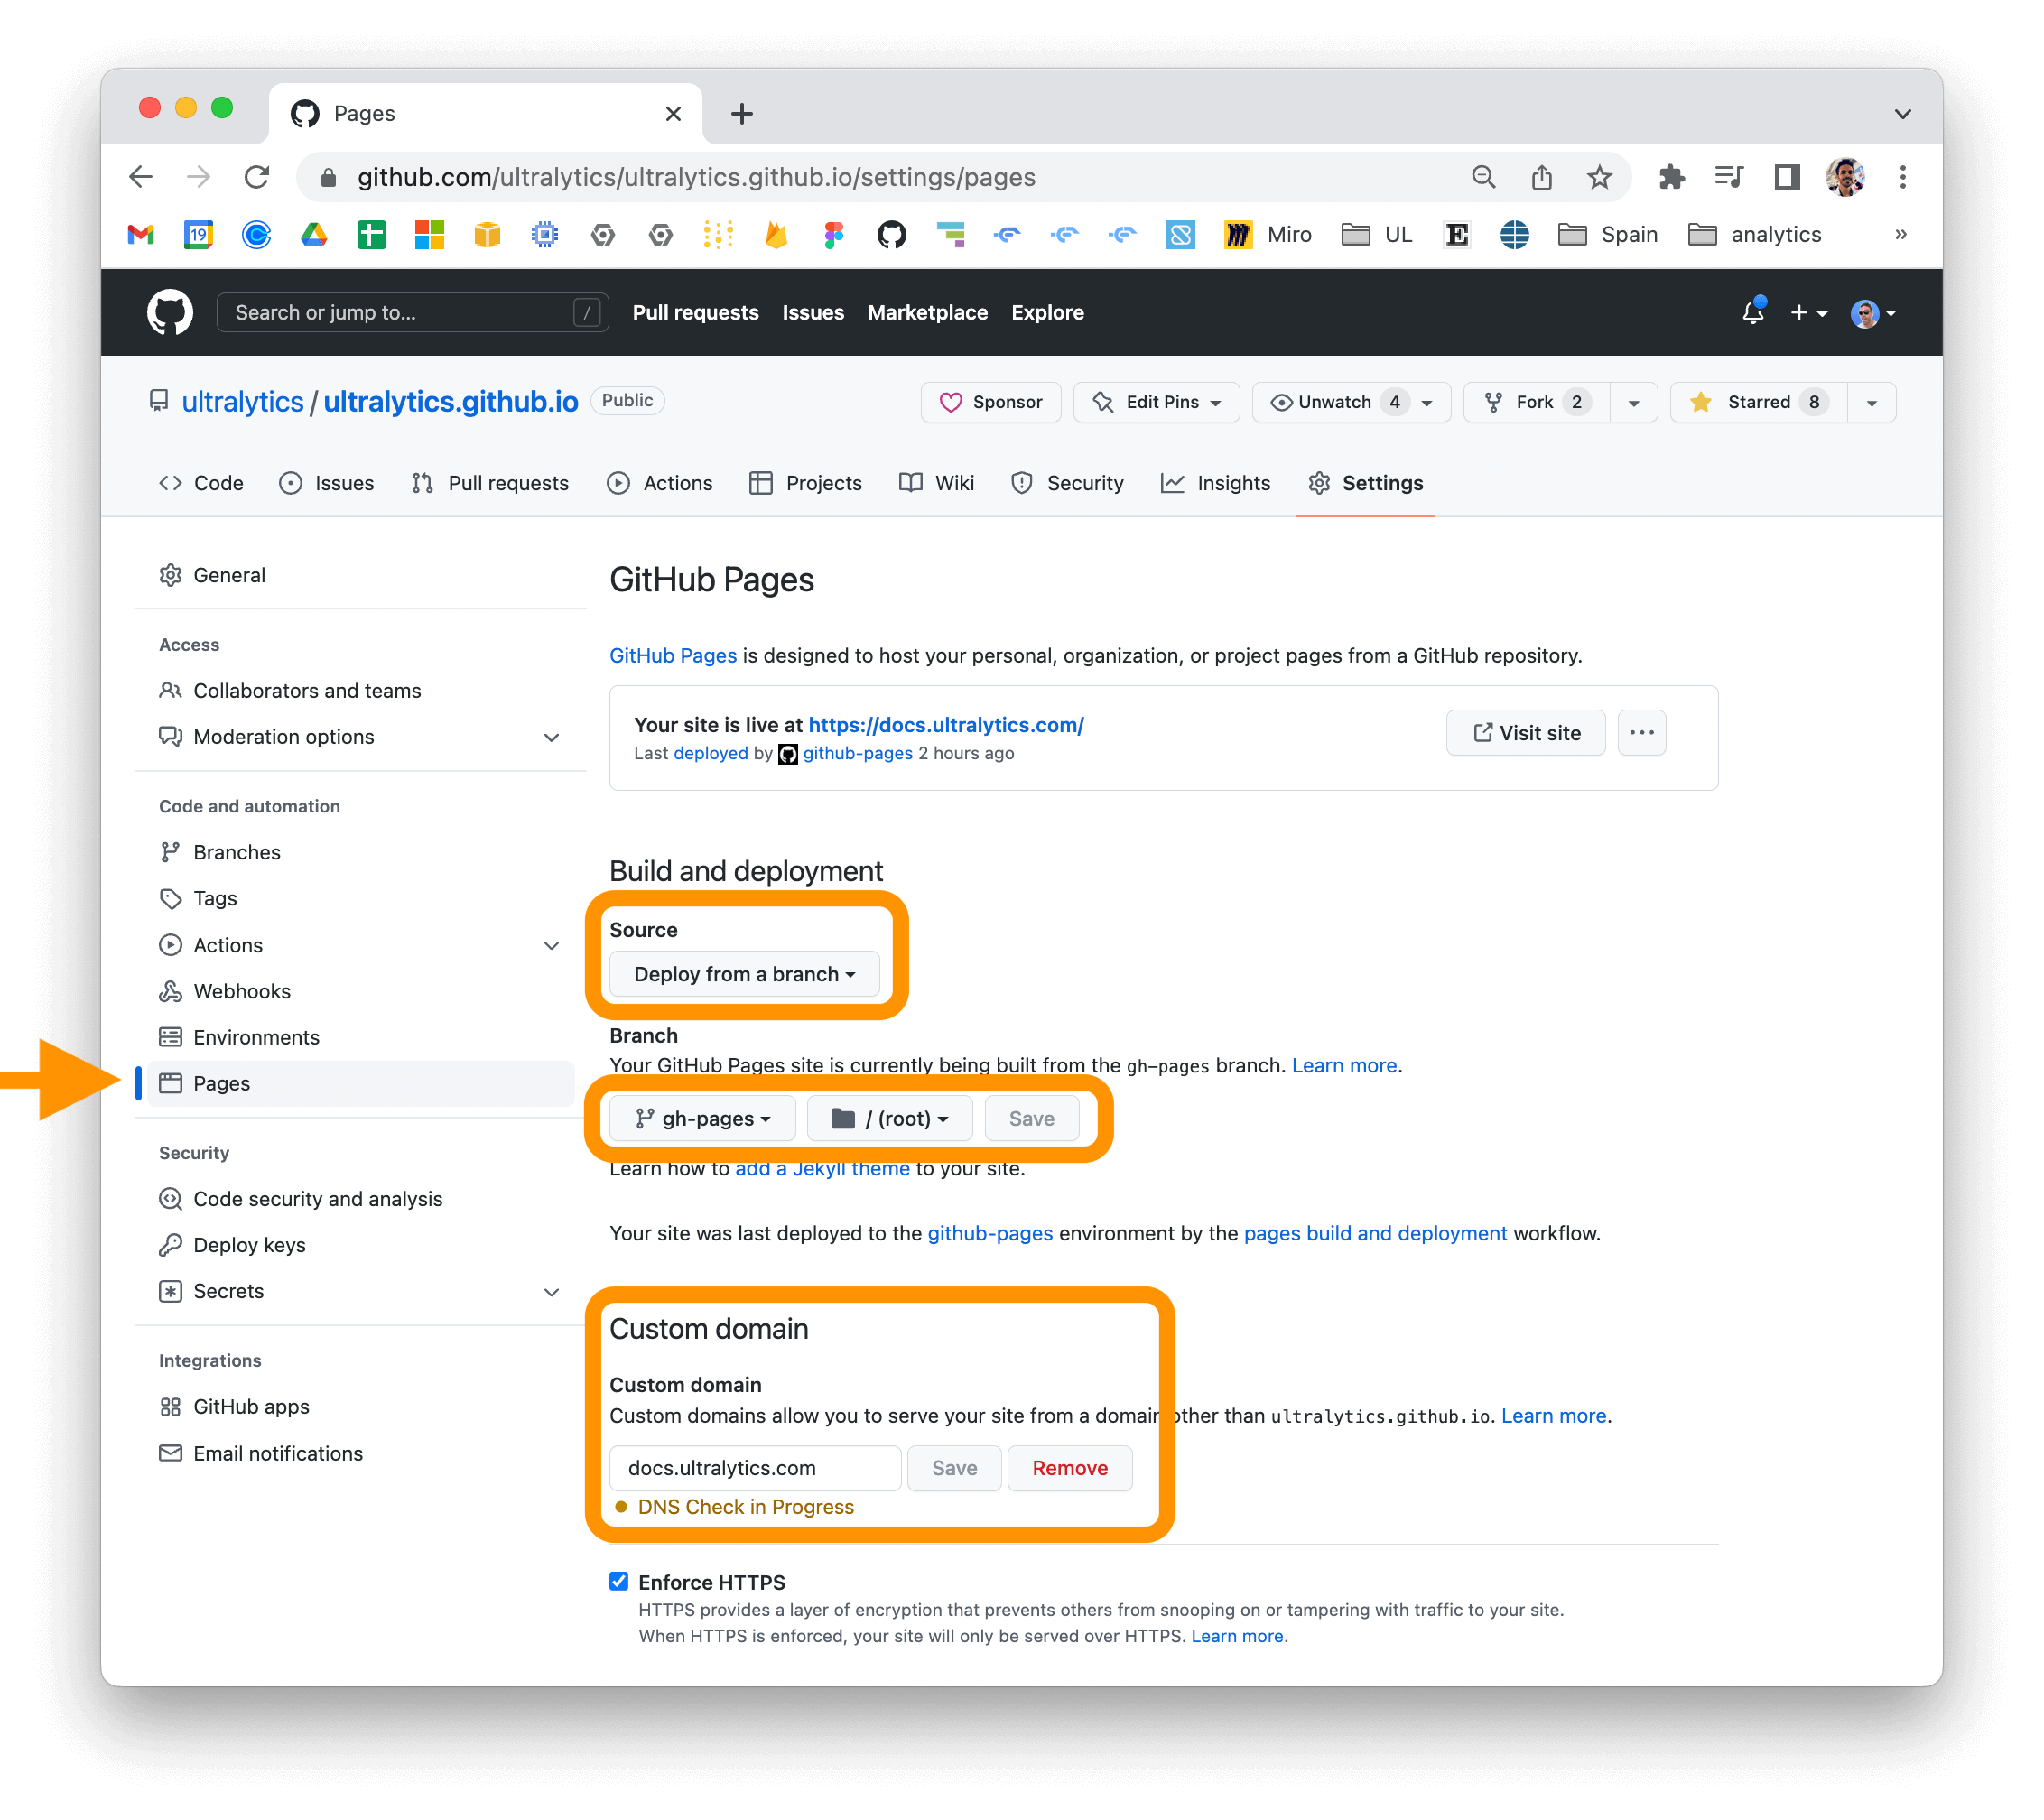
If you are using GitHub Pages, you can set a custom domain for your documentation site by going to the "Settings" page for your repository and updating the "Custom domain" field in the "GitHub Pages" section.
For more information on deploying your MkDocs documentation site, see the MkDocs documentation.
